|
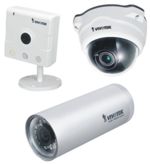 Vivotek IP Camera Remote Access iPhone Vivotek IP Camera Remote Access iPhone
Vivotek IP cameras are remotely accessible using the iPhone. This article will walk the user through the process of accessing their Vivotek IP camera remotely on an iPhone. In this article, we will be using the iCamViewer iPhone application developed specifically for CCTV Camera Pros.
Vivotek IP Camera Remote Access iPhone
1. First, make sure that you have forwarded the correct ports in your router. If you need assistance forwarding the ports in your router, please visit our Vivotek IP Camera Network Setup article.
2. Now using an Internet Explorer web browser, log in to your Vivotek camera using the IP address. (Note: By default, the password is either left blank or root, depending on the model you have.)
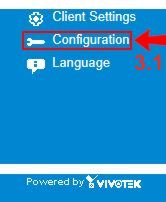
3. Once you're are logged in, click the Configuration tab on the left column (3.1). Then click [Advanced Mode] on the next screen (3.2). (Shown Below)
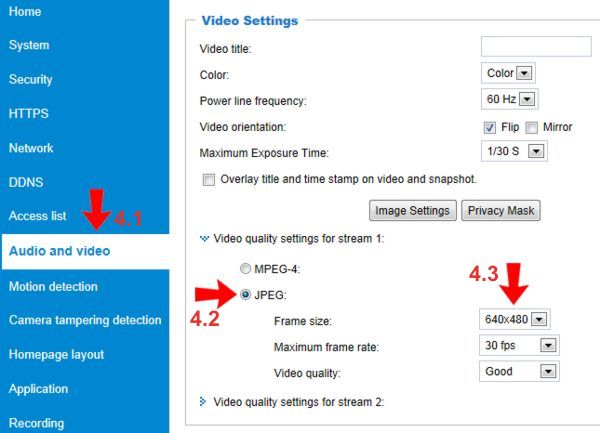
4. On the left column click the Audio and Video tab (4.1). Then under Video quality settings for stream 1, select JPEG (4.2). Adjust your Frame Size, Maximum frame rate, and Video quality to meet your specifications (4.3). Click Save to apply the new settings. (Shown Below)
5. Now go ahead and download the iCamViewer application from the App Store. Once you download the app on your phone, go ahead and launch it.
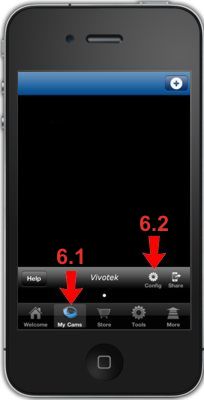
6. On the main iCamViewer page, select the My Cams tab at the bottom (6.1). Then select the Config button (6.2). (Shown Below)
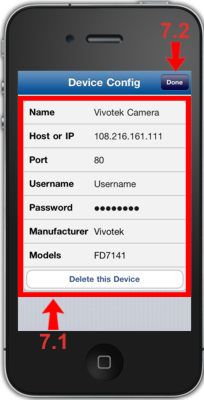
7. Now enter in your camera's Name, Remote IP Address, Port, Username, Password, Manufacturer, and Model (7.1). Then click the Done button in the upper right (7.2). (Shown Below)
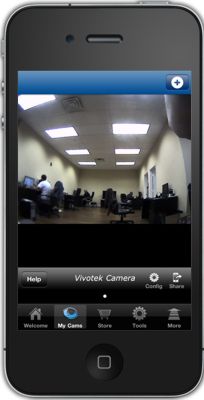
8. If the information you entered is correct, you will be able to see your camera on your iPhone. (Shown Below)
|


