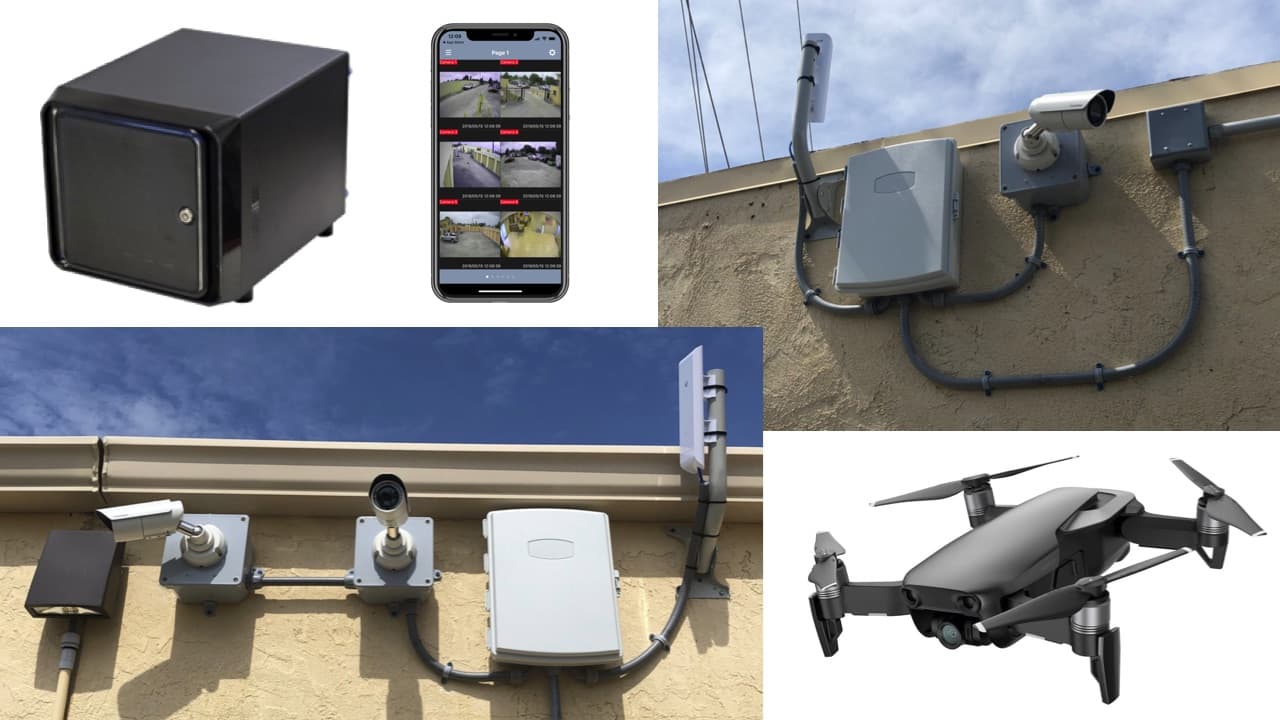
Self Storage Security Camera Systems
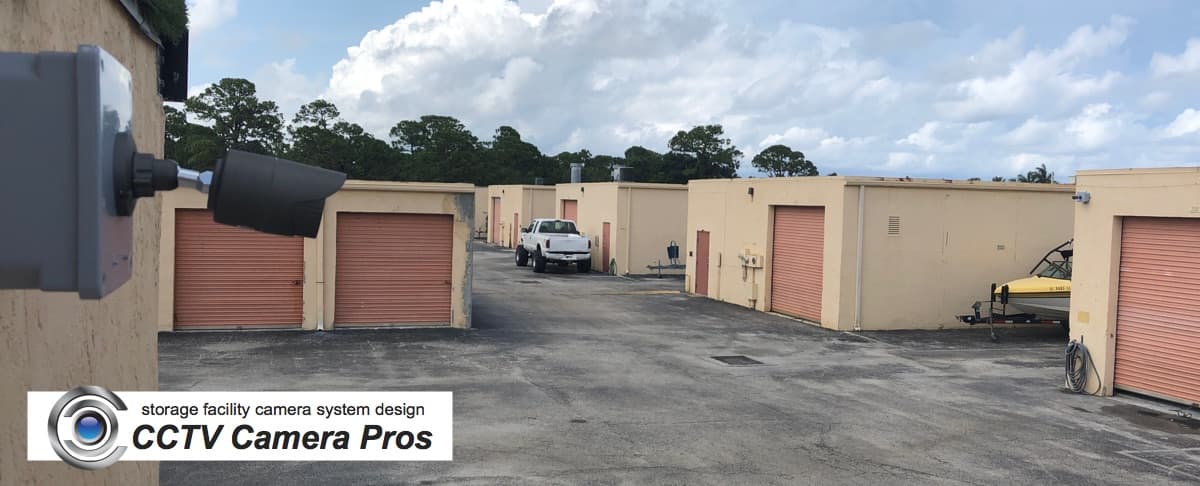
CCTV Camera Pros custom designs security camera systems for warehouses and self storage facilities. Some storage facilities consist of a large property with separate storage buildings at multiple locations on the property. Designing a proper wireless video surveillance system that spans multiple physical buildings with all cameras recording to a central DVR / NVR recorder takes careful planning. CCTV Camera Pros can help design systems for simple single building warehouse and complex multiple building storage facilities.
Please note that we can design wireless security camera systems for any type of property. These designs are not limited to storage businesses.
We have designed security camera systems for customers in all 50 US states. We can work with your local electrician by pre-configuring the entire system before it is shipped and providing ongoing technical support via our dedicated call center during and after installation. We provide lifetime technical support with all of the products and systems that we supply.
You may
request a free consultation here to get started.

You can also learn more about the
wireless camera systems that we design by reading more below about a real project that we recently completed. You can also watch this video that documents a
multi-building outdoor wireless camera system via drone video footage.
This video reviews a wireless camera installation design that spans multiple buildings using video footage captured with a drone.
Here is a custom system that CCTV Camera Pros designed for a self storage facility in West Palm Beach, Florida. This type of design is typical for storage facilities that have multiple buildings and is applicable to any type of property with multiple buildings. The system was installed by our South Florida installation, Air-Ref Company. Tom at Air-Ref is a licensed electrician and general contractor. We design systems like this for businesses and government facilities in every US state. We create installation plans for your local electrician, contractor, or local alarm installer. After installation is complete, CCTV Camera Pros can perform almost all technical support remotely.
Design Process
For this project, we met with the storage facility manager to gather customer requirements and perform an initial site survey. Based on the below site survey, Mike at CCTV Camera Pros created an initial system design and an installation requirements document for our installation partner. Our installation partner provided the labor quote to run the new power, mount all of the cameras and mount all of the wireless antennas. Based on the system design and installation cost, CCTV Camera Pros presented the complete design and quote to the storage facility manager, which was approved.
Site Survey
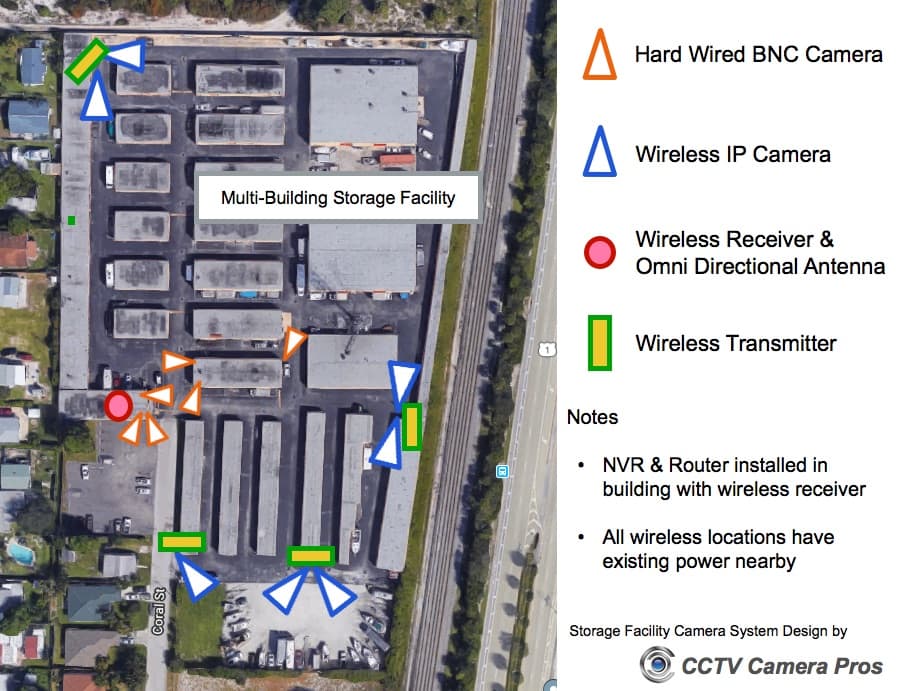
This is a map overview of the entire property with our notes that show the wireless antennas and cameras placement. You can see that like many storage yards, the property consists of many separate buildings for storage units. These cameras do not cover all areas of this property. These are the most sensitive areas that the facility owner wanted to monitor. They plan on adding more cameras in the future. The recorder that we used for this project supports up to 64 cameras, so there is plenty of room to expand the system over time. Here are the notes from the site survey.
- The building on the map with the wireless receiver and omni-directional antenna is the office. The office is a two story building an upstairs apartment for the property manager. It worked out very well that the office is two story and all of the storage unit buildings are one story. This made it easier to have a direct line of site between all of the transmitter antennas and the receiving antenna on the office building.
- There are four areas on the property where the owner wanted to have new cameras installed. These are the areas noted on the site survey with the wireless transmitters and IP cameras.
- The office had two existing outdoor analog CCTV cameras in place office that were hard wired to an old analog DVR. These cameras were hard wired to the DVR using cheap pre-made camera cables. We planned on replacing these cables with higher quality RG59 Siamese cable to support HD coax security cameras.
- The three cameras on the building to the right of the office were also existing and hard wired. The previous installer used RG59 Siamese cable to run connectivity from the storage unit building to the office building. We re-used this existing cable, but replaced the analog cameras with HD-over-Coax BNC security cameras.
- There is a small IT room located inside the office building where the existing coax cable is run to. We planned on installing a GeoVision NVR and AHD to IP video server there. This enabled both hard wired and wireless security cameras to record on the same DVR / NVR.
Office Building Design
Here is a detailed diagram of the equipment that is installed at the office building.
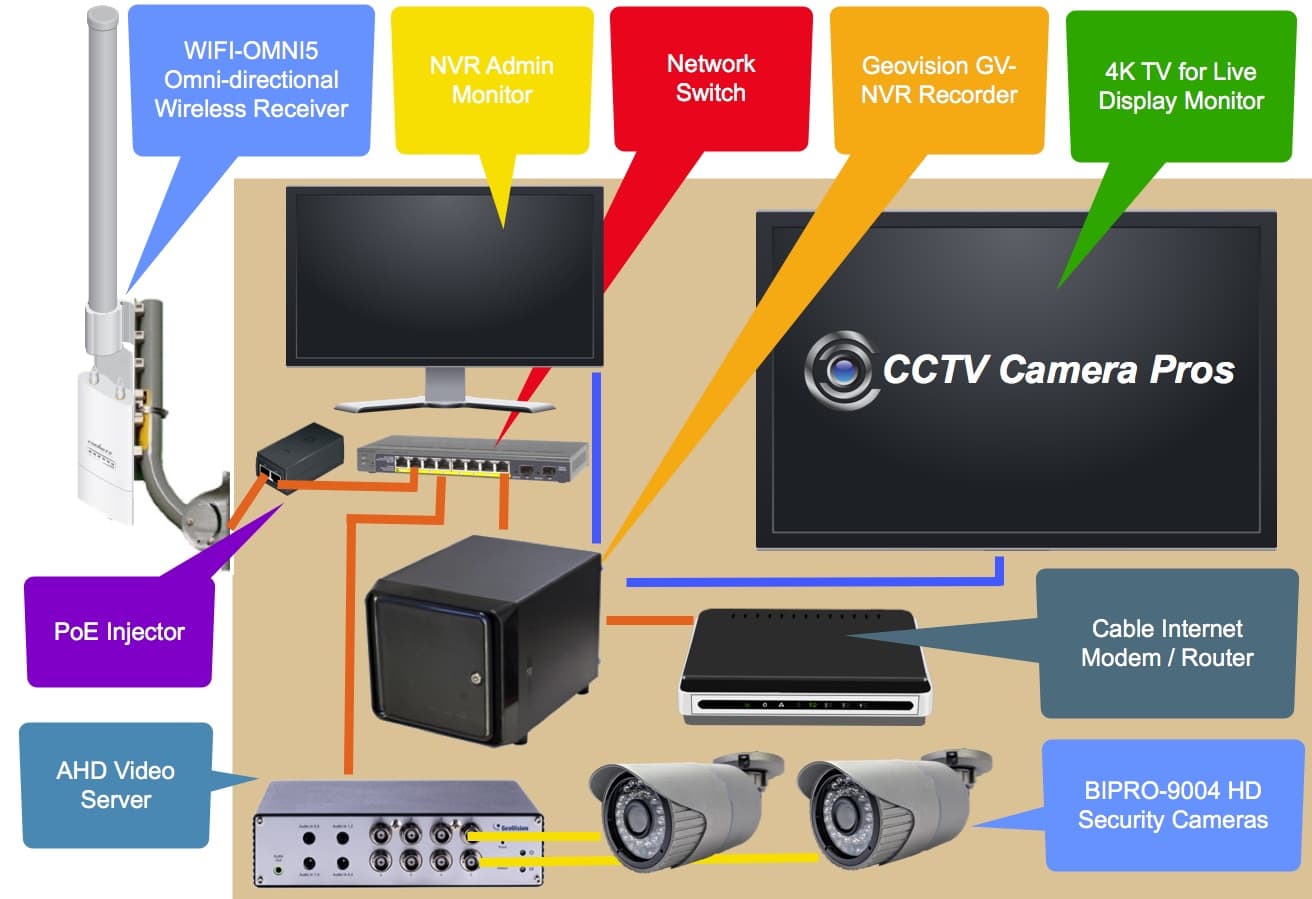
The office building is where the DVR / NVR is located and also the receiving antenna that all of the wireless IP cameras on the other buildings transmit video signal back to. This is how it works.
- The WIFI-OMNI5 omni-directional wireless antenna is connected to a WIFI-MR5 wireless receiver and both are mounted to the roof fascia on the second story of the office building using this J-Pipe pole wall mount. This antenna protrudes about 2 feet higher than the top of the roof and receives the wireless signal from the wireless transmitters at the 4 storage unit building locations.
- The wireless receiver is connected to the PoE injector that is included with it using CAT-5 cable. The LAN port of the PoE injector is connected to a network switch. There is a close-up of this wiring below.
- One of the network ports on the GeoVision NVR is connected to the same network switch. The custom GeoVision NVRs that we build have two Ethernet ports. This allows you to keep all of the network traffic from your IP cameras separate from the main network of the business. This avoids network congestion. These recorders can be configured to record continuously and also based on motion detection.
- The other network port on the GeoVision NVR is connected to the office's Internet modem and router to enable access to this system from remotely over the Internet. The facility manager and owner will be using mobile apps for Android and iPhone to remotely view the security cameras. For this particular installation, the facility was using Comcast cable Internet.
- The NVR has 3 HDMI outputs. 2 are being used in this installation. One for the smaller computer monitor that is used to manage the surveillance system. The second HDMI output is connected to a 40 inch 4k TV that is used as a live security camera display monitor in the lobby of the office.
- The device just below the NVR is a 8 port AHD to IP GeoVision video server. The video server has 8 BNC video inputs and connects to the network switch. The network video server converts the HD video signal from the coax wired AHD security cameras to an IP signal so that the video feeds can be recorded on the GeoVision network video recorder.
- Not all of the hard wired security cameras that were used in this installation appear in the above diagram. The office building has 3 of these BIPRO-9004 IR security cameras installed. These camera have built-in infrared night vision. One is used to monitor the gated entrance, one for the parking lot, and one for the staircase of the office. These cameras are hard wired to the video server using RG59 Siamese cable. The power portion of the Siamese cable splits off and connects to a 12V DC CCTV power supply box to power the cameras.
- There are also (3) BIPRO-9004 BNC cameras installed on the storage unit building across from the office.
- Last, there is one HD-D180 180 degree dome security camera installed inside the office.
- All (7) of the hard wired security cameras connect to the BNC video inputs on the video server.
Wireless Camera Systems (Storage Unit Buildings)
The 4 storage unit buildings all use this same outdoor wireless camera system design. The only exception is that one of the locations uses a single IP camera instead of two.
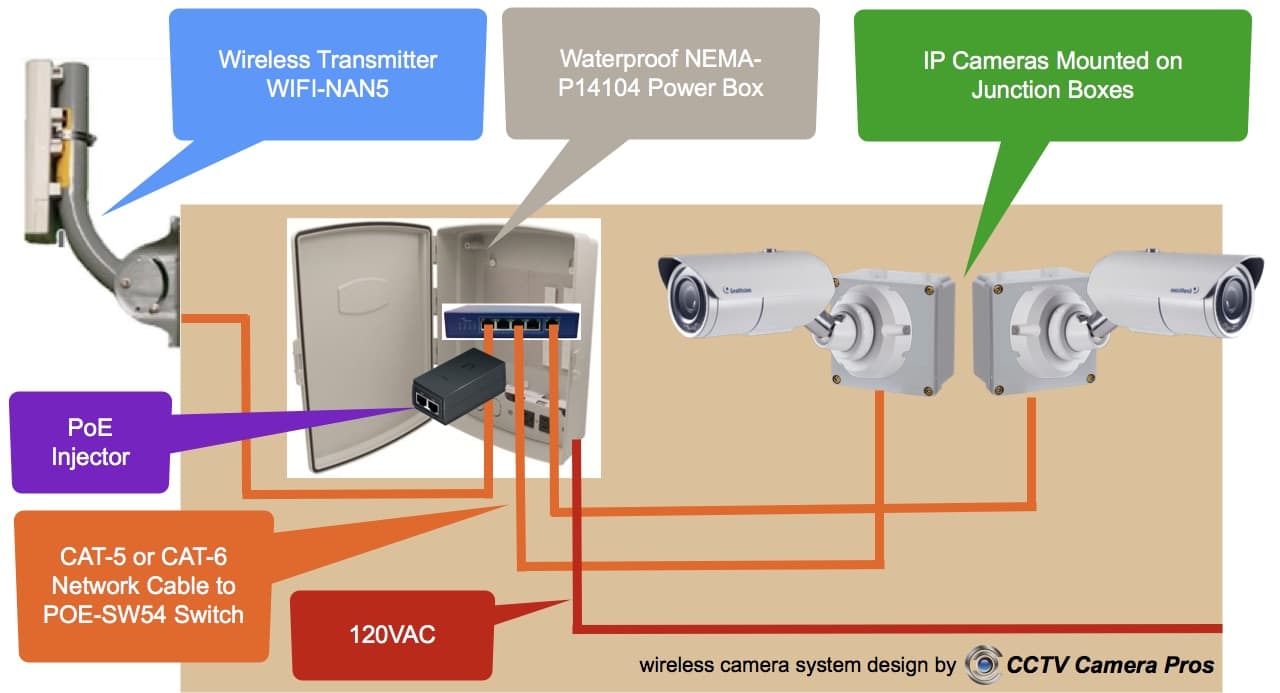
This is how it works.
- There are two IP cameras mounted to each of the remote storage unit buildings. Except for one of the four locations which has a single IP camera, everything else is the same.
- The IP cameras are mounted to a 6x6 PVC junctions box, which is mounted to the wall of the building.
- CAT5 cable is used to connect each of the IP cameras to a POE-SW54 PoE network switch.
- The PoE switch is mounted inside this weatherproof NEMA power box using Velcro.
- The NEMA power box is hard wired to a 120VAC power source of the building.
- A WIFI-NAN5 wireless transmitter / antenna is mounted to the building using this wall mount pole. The pole mount sticks up past the roof of the building. There is a direct line of sight between this WIFI-NAN5 and the WIFI-OMNI5 located at the office that it transmits the video to.
- The WIFI-NAN5 is wired to the POE injector that is included with it. CAT-5 connects the WIFI-NAN5 to the PoE input port on the injector. The LAN port of the injector is connected to the uplink port on the POE-SW54 network switch.

Here is a close-up of the camera and antenna wiring. Notice that the main port of the wireless antenna is connected to the POE port on the POE injector. The LAN port of the injector is connected to the network uplink port of the PoE switch. The PoE injector connected to the standard power outlet that is inside the NEMA box.
Storage Facility Security Camera Installation
Here are some pictures of the completed installation.
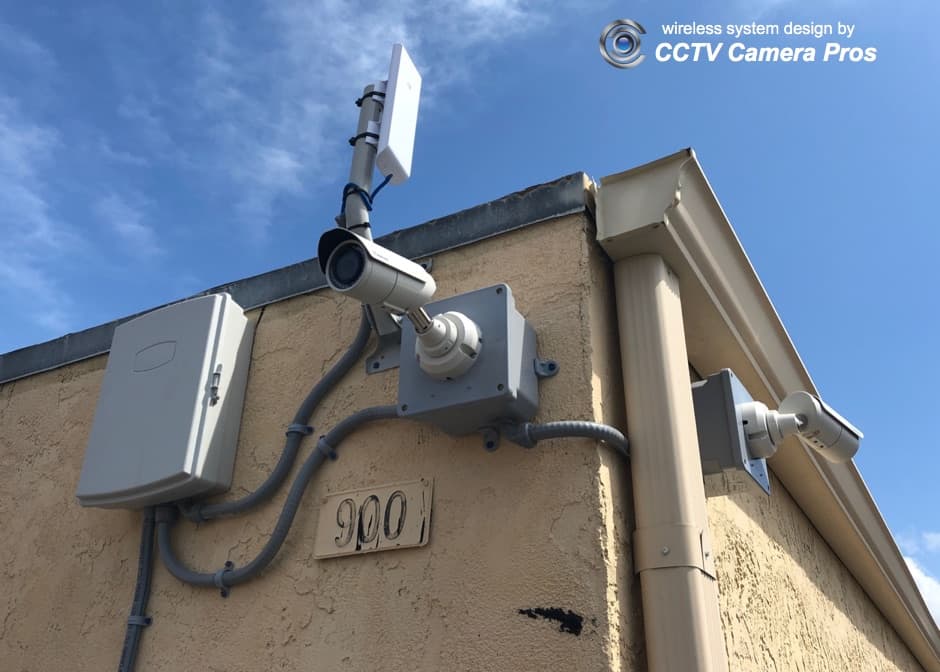
This picture shows one of the four storage unit buildings with a wireless system installed. Notice that the wireless transmitter sticks up well past the roof the building.
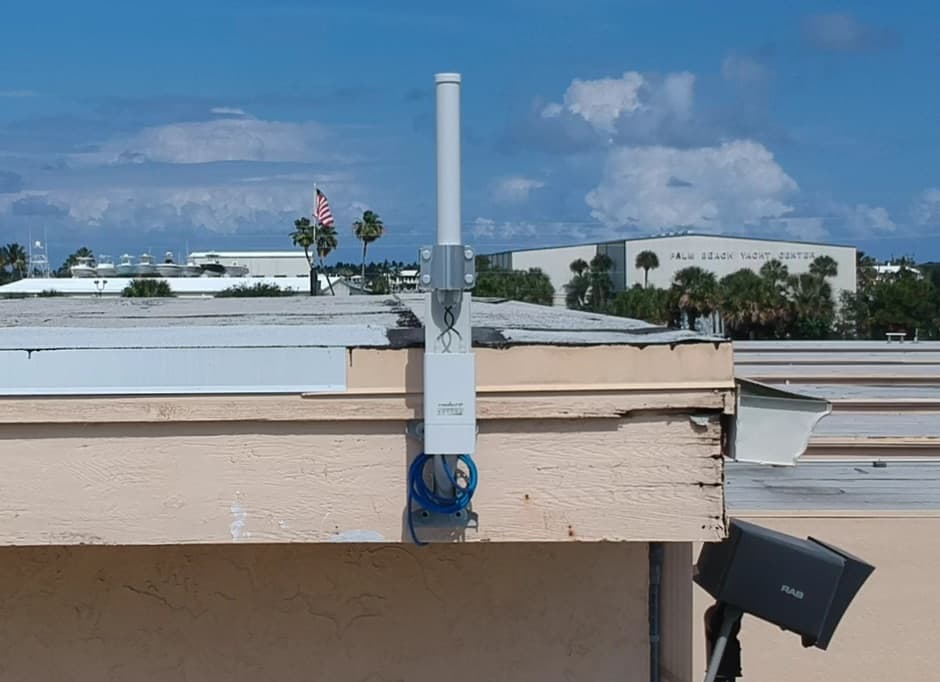
This picture shows the omni directional wireless antenna installed at the office building. This antenna receives the wireless video signal from all of the wireless security camera systems.
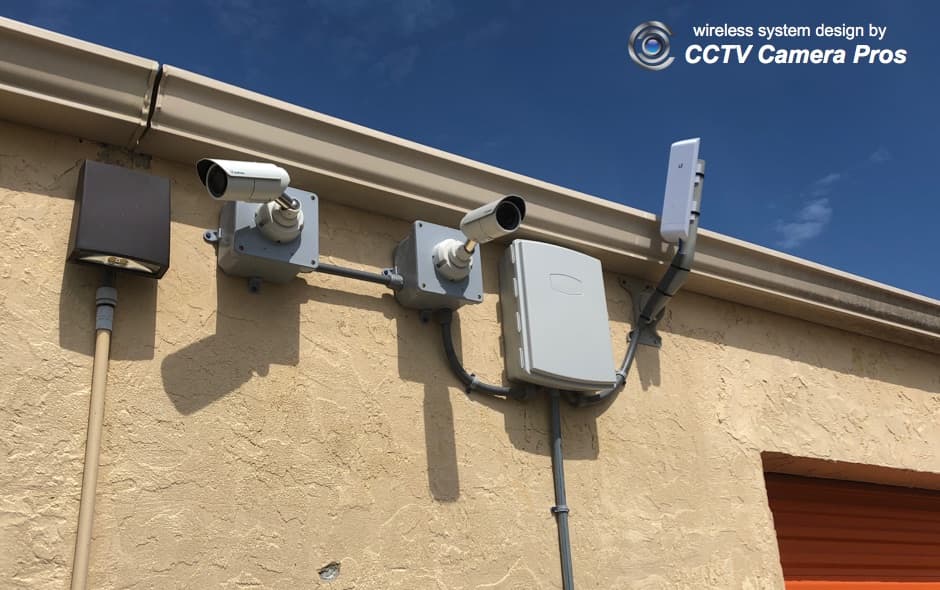
This picture shows another one of the four storage unit buildings that has two IP cameras and a wireless transmitter installed.
Wireless Antenna Direct Line of Sight
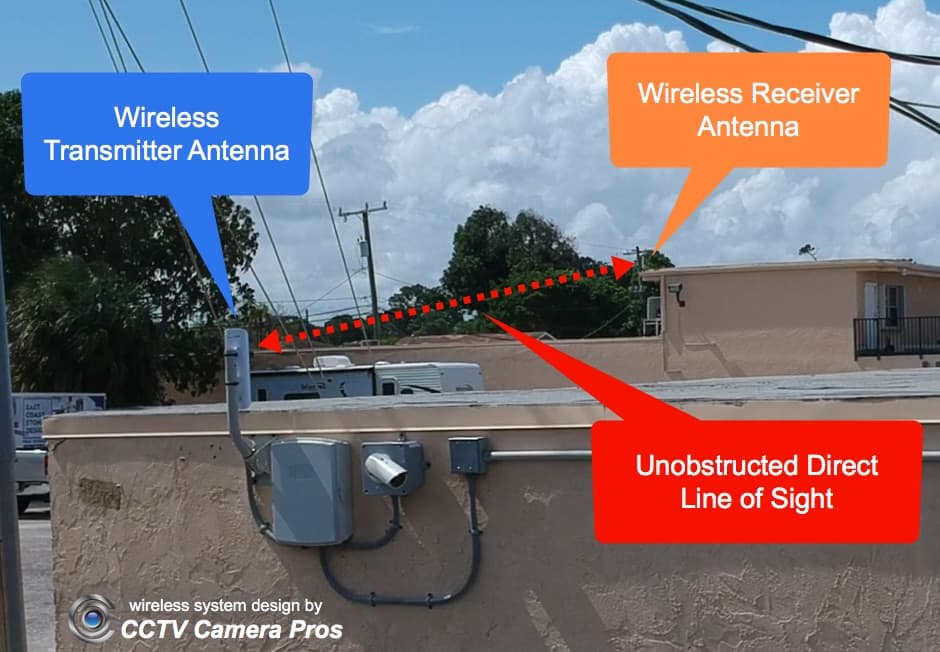
This picture shows how the wireless antennas are installed with a direct line of sight.
Remote Security Camera View from Mobile App
The GeoVision NVR that we used in this application has excellent support for remote viewing from iPhone and Android apps. Here are a few pictures captured in the iOS app.


System Pre-Configuration for Installers
All of the wireless antennas were pre-configured by CCTV Camera Pros with IP addresses at our office before delivery. We also pre-configured all of the wireless transmitter antennas to automatically connect to the wireless receiver antenna. Our local installation partner and general contractor ran all of the electric, mounted the junction boxes, IP cameras, wireless antennas. CCTV Camera Pros confirmed all of the wireless connections were stable and that the recording software was properly configured according to the customer's requirements.
We follow this process with electricians and installers nationwide. For jobs that are not local to South Florida, the local electrician or contractor performs the initial site survey.
Request a Design Consultation and Quote
The system documented on this page is one of many systems that we have designed. You may
request a free consultation here to get started with us designing a system for you. Our services are not limited to storage facilities. We design wireless camera systems for all types of commercial and government buildings.

BBB Rating & Reviews

CCTV Camera Pros is proud to have an
A+ rated with the Better Business Bureau. We also maintain a 5 star online review rating with ResellerRatings.com.
Questions / Help
Please call us at 888-849-2288 or
email us here with any questions that you have.
Related Products and Articles
|


