Premade Siamese Coax Cable Wiring Guide
for Analog CCTV Cameras & HD Security Cameras (HD-TVI, AHD, HD-SDI, HD-CVI)

This guide will educate the reader on techniques for wiring security cameras and video surveillance systems using
premade Siamese coax cable. It specifically covers security cameras that use coax cable to transmit video to DVRs and monitors including HD-TVI, AHD, HD-SDI, HD-CVI, and analog CCTV cameras. The following topics will be discussed.
Another cable option for video over coax type surveillance cameras is to use spools of RG59 Siamese cable. This allows the installer to cut the cable to the exact length needed, but requires that the BNC connectors be attached to the cable. CCTV Camera Pros has 500 and 1000 foot spools available. We also sell packages that include BNC connectors, cutting tool, and crimping tools. You can find
RG59 cable & complete wiring packages including installations tools here.
Premade Siamese security camera cables have a male
BNC connector already attached on each end of the cable and also have 2.1mm power plugs pre-attached (male on one end and female on the other). This can save professional and DIY installers a lot of time because they do not need to attach these connectors. If you are going to use premade cables with HD security cameras (AHD, TVI, CVI, HD-SDI) you must make sure that the gauge of cable used for the video is certified for HD video. Some thinner premade CCTV cables will not work with 720p and 1080p cameras. The
premade camera cables on this page work with all HD over coax type cameras
Another thing to consider is that the length of pre-made cables is fixed. You can not cut the connectors off of premade cables and re-attach to shorten the length of the cable. This is not an issue in most installations where excess cable can be tucked away somewhere.
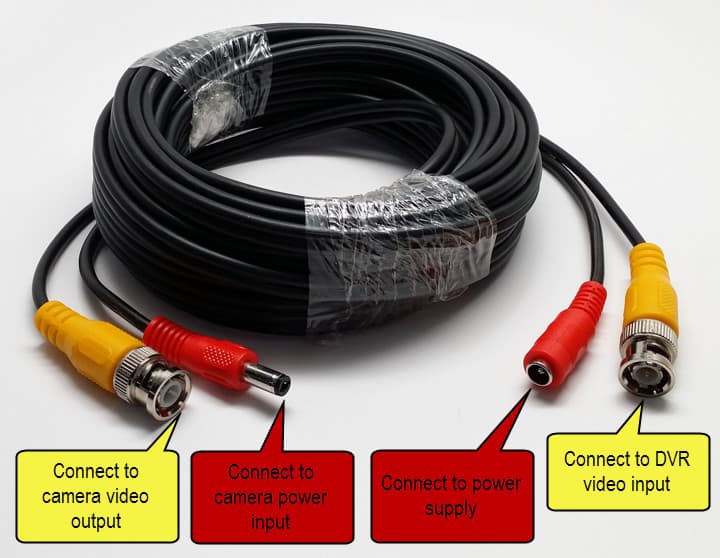
Above is a picture of premade cables. You can see the
BNC male connectors on each end and the male and female power plug on opposite ends.
Important Installation Tip!
When installing pre-made cable, be sure that you run the correct end to your camera and DVR. You will notice that the power supply connection is different on the two ends of the cable. You don't want to run an entire cable and find out that you ran the wrong end to your camera or DVR.
Most 12V DC security cameras (analog CCTV and HD) have a 2.1mm DC power plug (male) already connected to the camera.
To connect the camera to the cables, the BNC connector on the camera end of the cable simply pushes and twists onto the BNC connector of the camera. The power lead of the camera simply pushes onto the power lead of the Siamese cable.
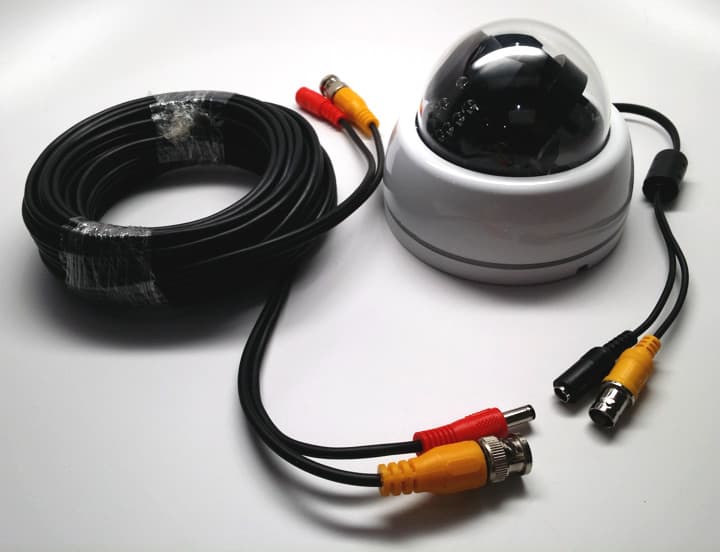
This is how the cable is connected to the camera's video and power leads.
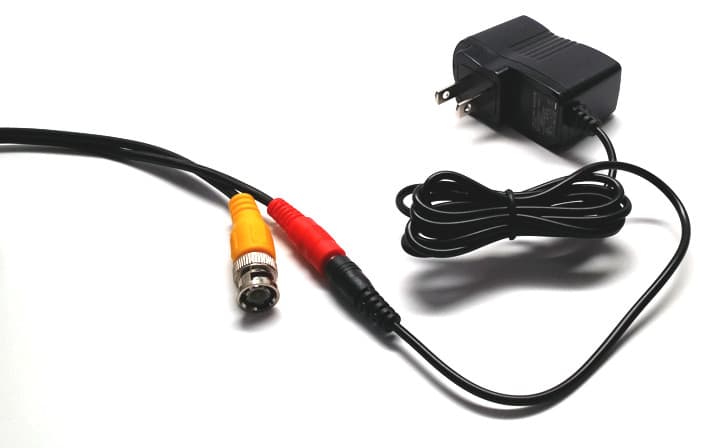
If you are using an
individual camera power supply / power transformer, this is what it looks like when you connect the power supply to the cable. This is the DVR end of the cable (opposite of the camera end).The BNC connector will plug into one of the BNC video inputs on the back of your DVR.
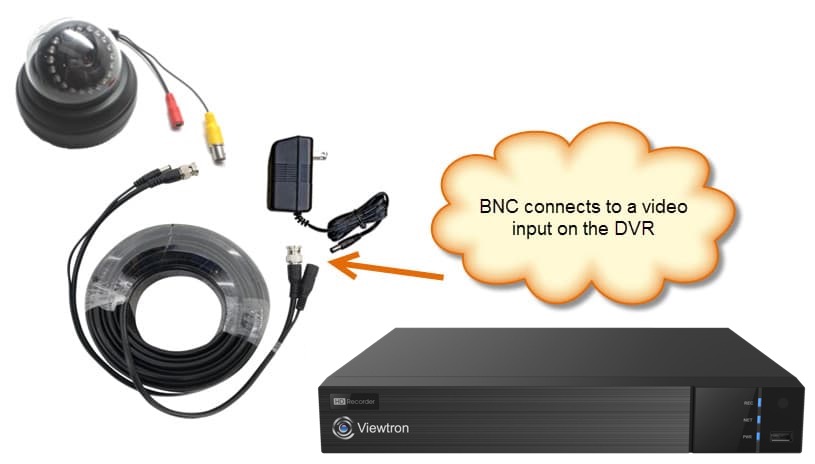
The above image shows a complete wiring setup with premade cables, an individual power supply, 12V DC camera, and a surveillance DVR. The camera in this picture is the AHD-D7W 1080p CCTV camera. The DVR is a Viewtron hybrid CCTV / HD security camera DVR.
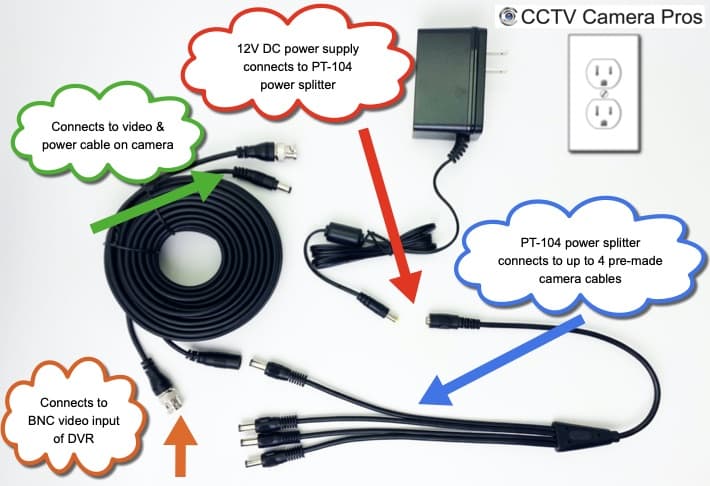
The above diagram shows how to use this
PT-104 power splitter cable to share one power supply with up to four 12 volt DC security cameras. This is how it works.
- The 12V DC power supply gets power from a standard power receptacle.
- The 12V DC power supply connects to the 2.1mm input of the PT-104 splitter.
- Each of the four 2.1mm outputs can be connected to a pre-made Siamese security camera cable.
- The BNC video output (noted above in orange) connects to the BNC video input of the security camera DVR.
- The other end of the security camera cable connects to the BNC connector and power input of the security camera (noted in green).
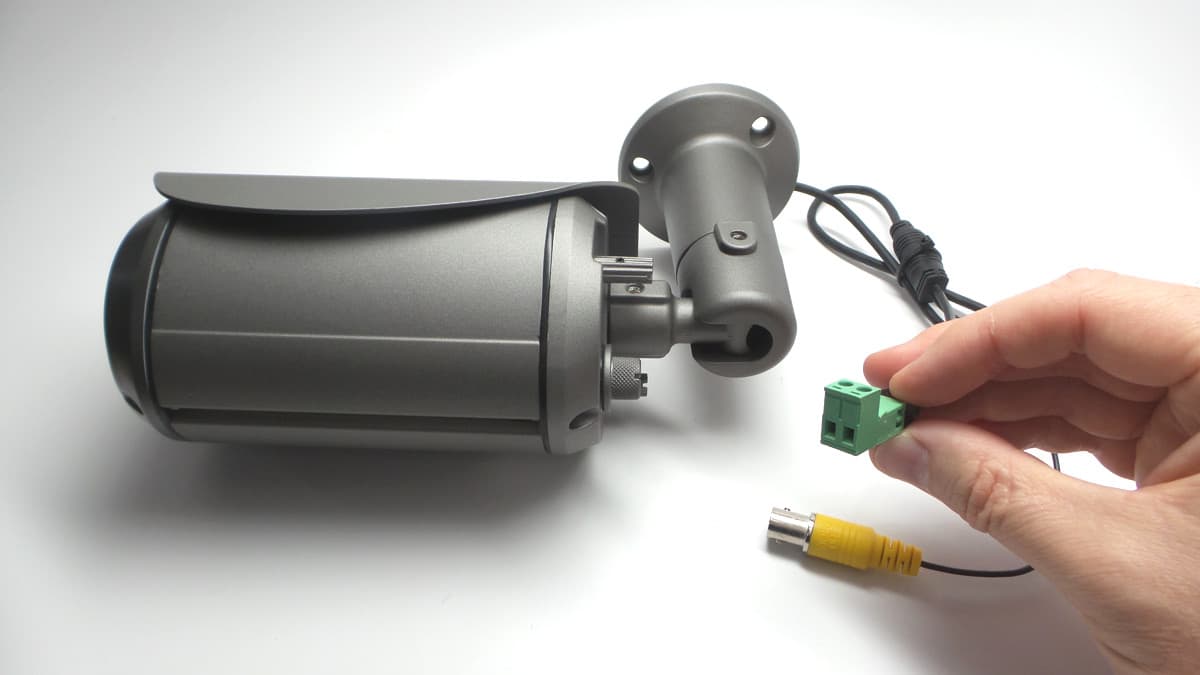
Most dual voltage security cameras (ones that can use a 12V DC or 24VAC power supply) do not have a 2.1mm plug attached to their power cable as seen in the previous image of the 12V DC camera. Above is a dual voltage
1080p HD CCTV camera. Notice the power terminal block that is used instead of a 2.1mm power plug.
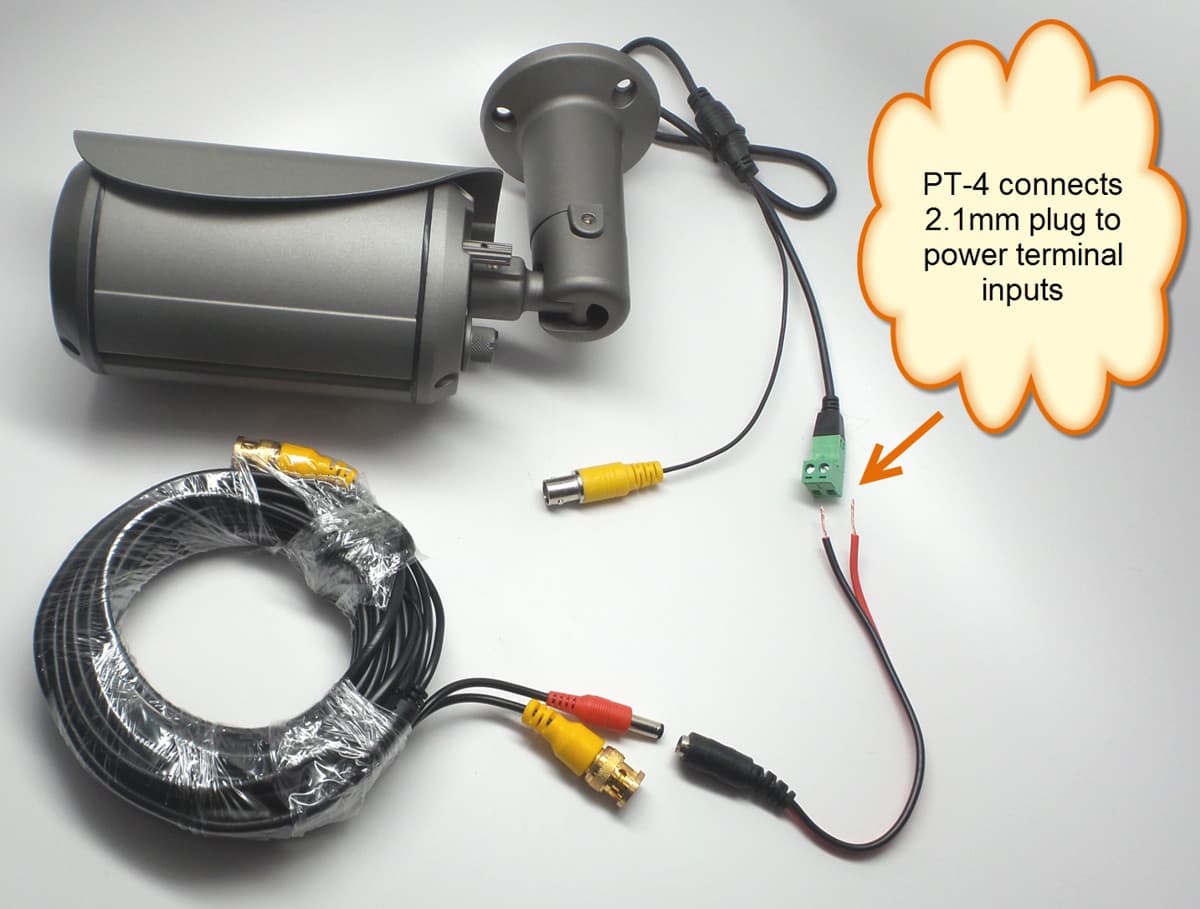
A
PT-4 pigtail power lead is used to connect the camera's terminal block to the 2.1mm female connector on the pre-made cables.
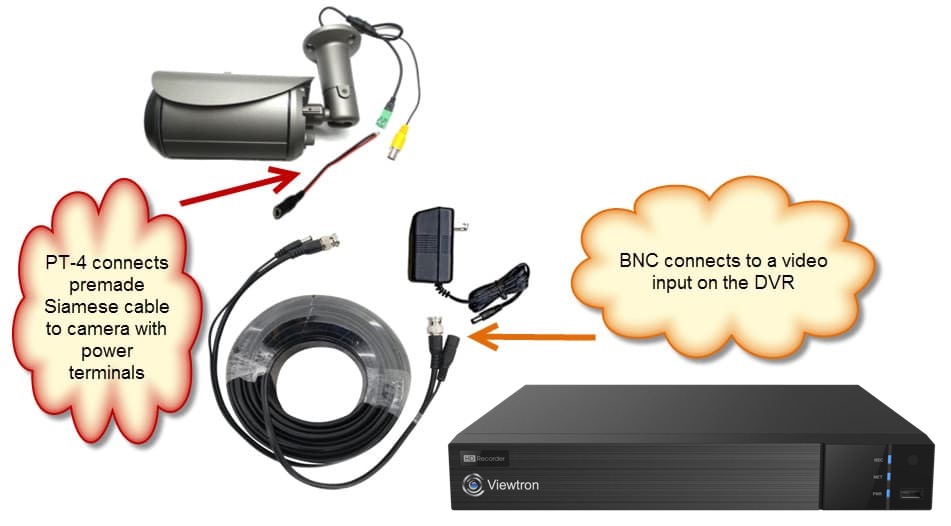
The above wiring diagram shows how a dual voltage camera can be wired using premade Siamese cables.
Multi-camera power supply boxes are used to centralize the power for video surveillance systems.
To wire security cameras to a
power supply box with pre-made Siamese cable, you need to attach a PT-3 power lead to the DVR side of the cable. This is because power supply boxes do not use the 2.1mm plug connector on the cable. Power supply boxes have + / - screw terminals for each channel of power.
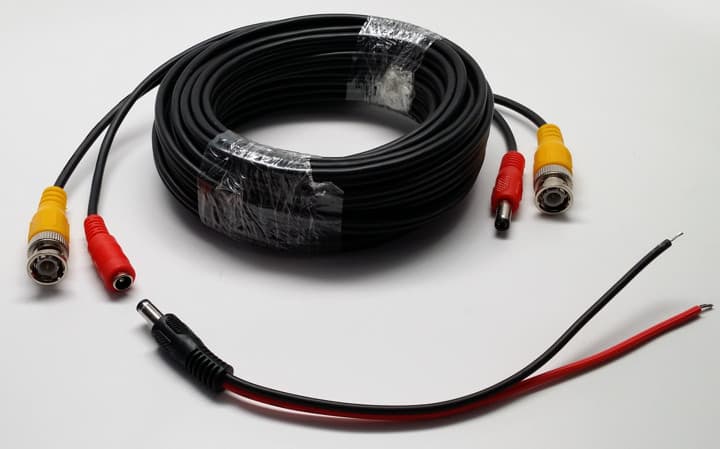
The wire end of the PT-3 pigtail power lead connects to the screw terminals of the power supply box.
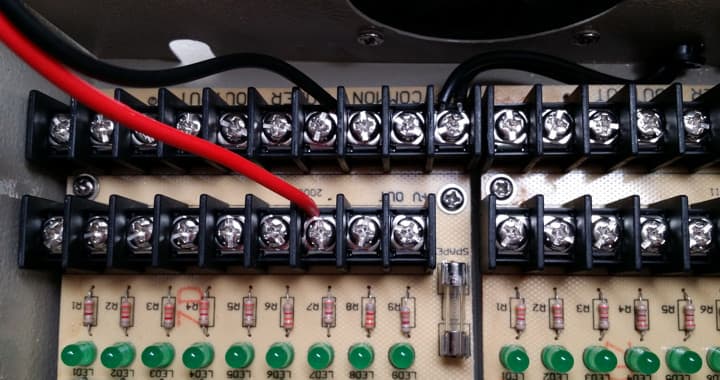
Power supply boxes are typically wall mounted near the DVR. This image shows how the video and power cable can be pulled apart so that the cable can easily reach both the power supply box and the DVR.
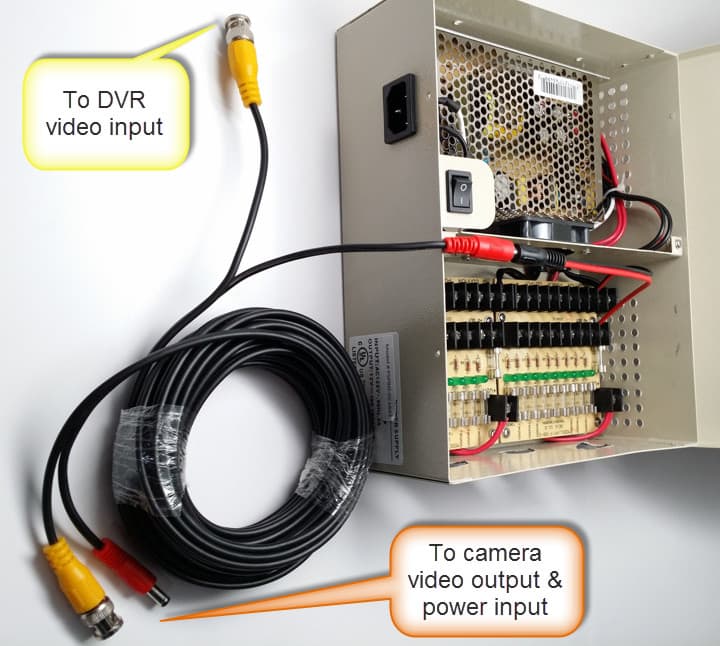
Here is overview of a CCTV camera system that is wired using a pre-made cables to a power supply box and surveillance DVR.
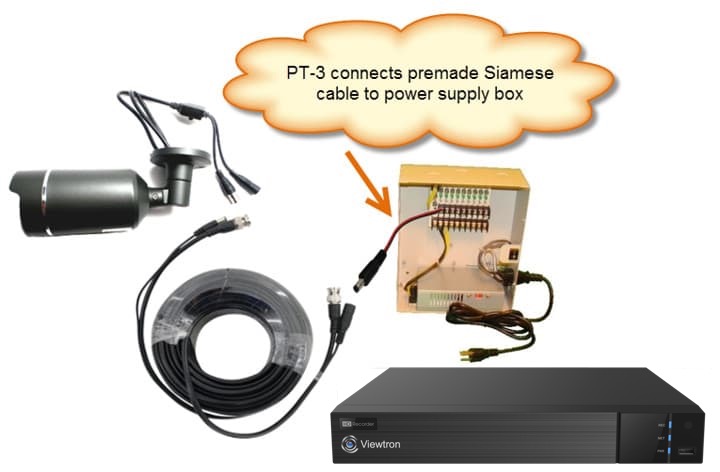
The above diagram shows how-to use a PT-3 power lead to connect premade Siamese CCTV cables to a multi-channel power supply box. The 2.1mm female end of the PT-3 plugs into the power portion of the Siamses cable. Then the raw cable ends connect to the power supply box with screw terminals. The BNC video end of the cable connects to the back of the DVR (Not shown connected in the picture). You can see additional pictures that show
how to connect CCTV cables to a power supply box here.
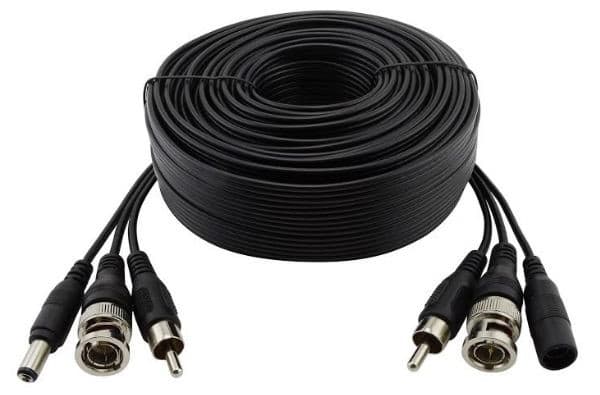
Premade cables are also available with an additional coax cable for audio. These cables can be used to wire
security cameras with built-in audio surveillance microphones or to share a power supply between a security camera and stand-alone audio microphone.
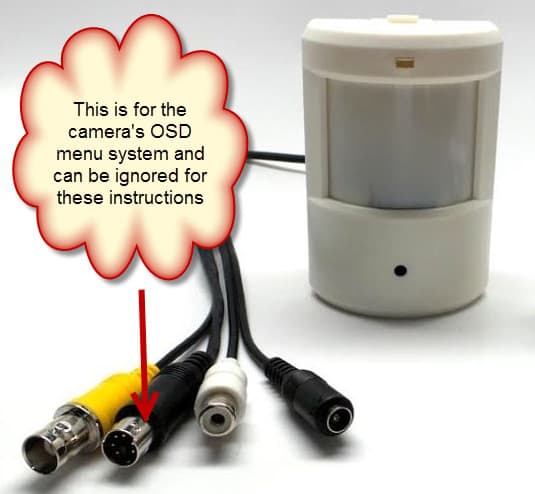
In the above picture, you can see a motion detector security camera with a built-in audio surveillance microphone. You can ignore the one connector that is used to connect a joystick to the camera to access the camera's OSD menu. The RCA connector is used for the microphone. The BNC and power lead are the same as security cameras without audio. A power supply box and individual power supply are connected in the same way as described above for non-audio cameras.
Security Camera with Add-on Microphone
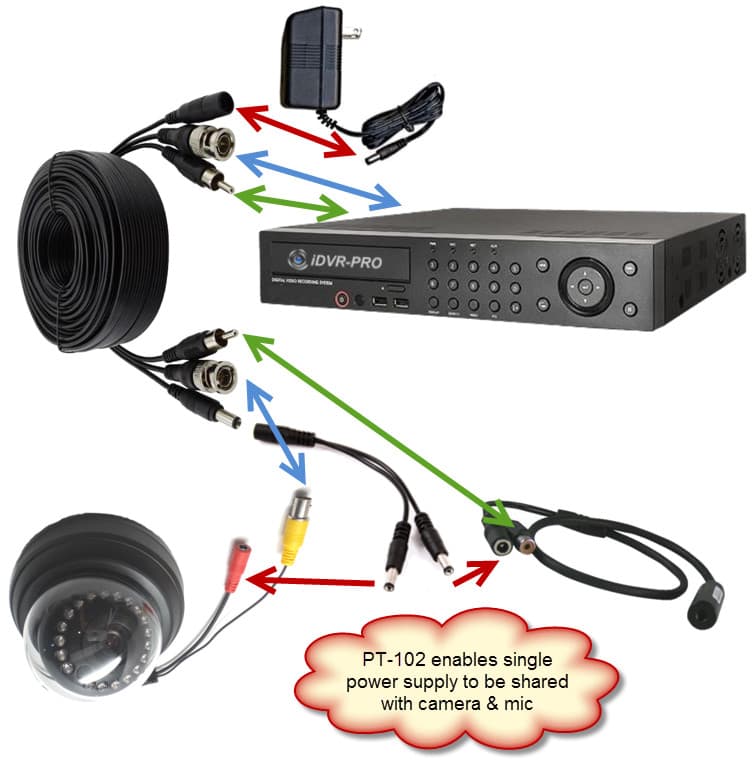
Audio, video, power cables can also be used to wire
stand-alone audio surveillance microphone (one that has it's own power input). In the above wiring diagram, a PT-102 1 to 2 power cable splitter is used to share a single power supply between an HD security camera and mic.
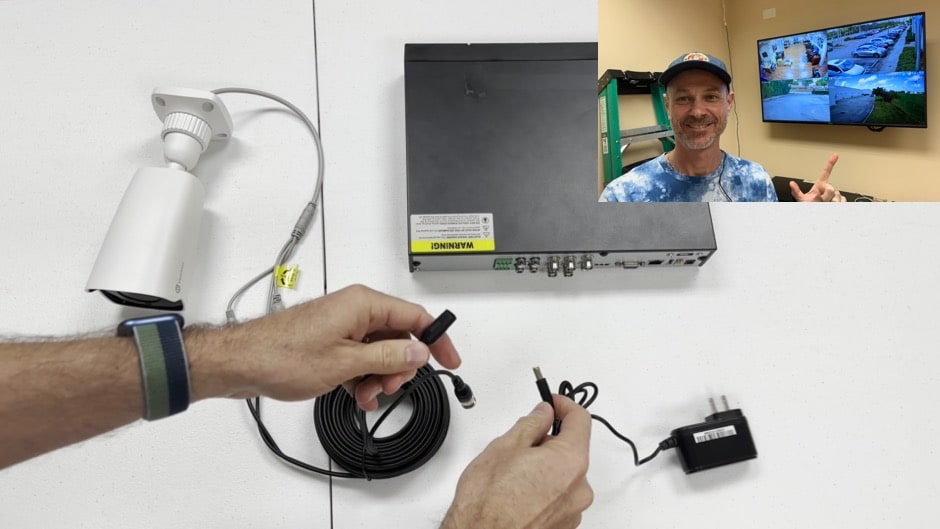
You can also watch the above video on how-to install a security camera with pre-made Siamese CCTV cables.
Available in CCTV Camera Pros Mobile App


This article, and many others, are also available in CCTV Camera Pros mobile app for iOS and Android. Please download the app to keep up with the latest installation discussions, product demonstration videos, and special offers / coupons.
About the Author

This article was written by
Mike Haldas, co-founder and managing partner of CCTV Camera Pros. If you have any questions about how to wire a security camera system using premade camera cables, please email me at mike@cctvcamerapros.net.
|


