NUUO IP Camera SetupThe following instructions show how to Install and Setup IP Cameras for a NUUO IP Surveillance System.
INSTALL IP CAMERA(S)
Step 1: Setup the IP camera(s) by following the instruction manual provided by the manufacturer.
Step 2: Check the network between the IP camera(s) and the system.
Step 3: Add the IP camera(s) to the system following steps.
ADD IP CAMERA(S)
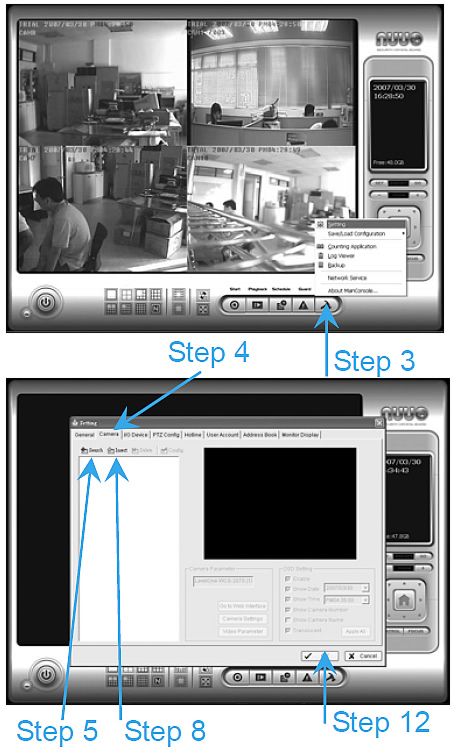
Step 1: Go to Start > All Programs > NUUO > Main Console.
Step 2: Type in username and password and log on to the system.
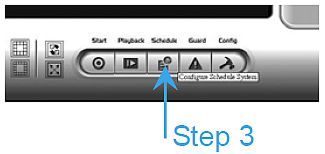
Step 3: In Main Console, go to Config > Setting to obtain the Setting panel.
Step 4: Go to Camera tab.
If your IP cameras support UPnP. Follow step 5. Otherwise, skip to step 8.
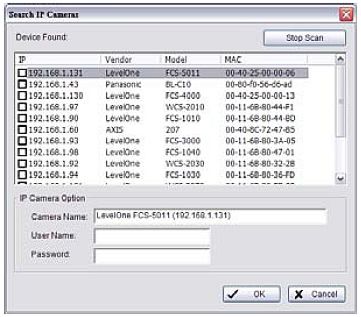
Step 5: Click Search to search for the IP cameras that are available at this point.
Note: Search function just supports the IP cameras with UPnP supported.
Step 6: Select one of the IP cameras that are available; check the option and enter the username and password.
Step 7: Click OK to add the camera.
Step 8: Click Insert to insert the IP cameras.
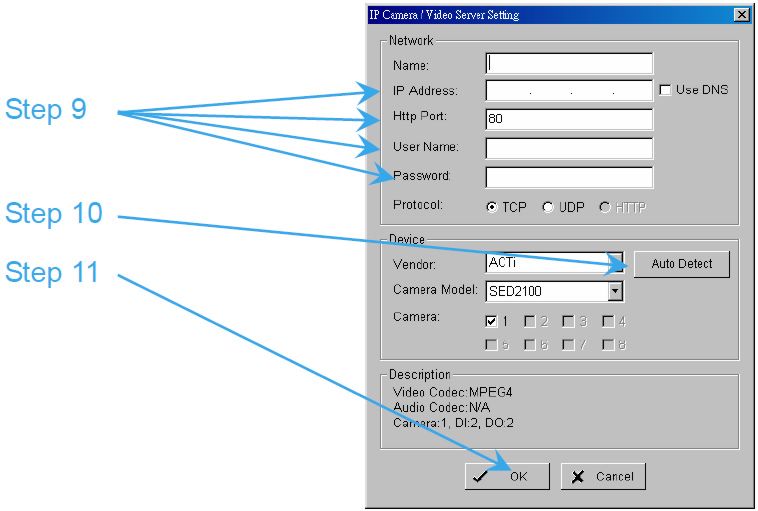
Step 9: Enter the IP address or domain name (check the Use DNS option), Http Port, Username, and Password.
Step 10: Click Auto Detect
Step 11: Click OK to add the camera.
Step 12: Click OK to exit the Setting panel.
SET SCHEDULE
Step 1: Go to Start > All Programs > NUUO > Main Console.
Step 2: Type in username and password and log on to the system.
Step 3: In the Main Console, go to Schedule.
Step 4: By default, when inserting a camera into the system, the recording
schedule is automatically set to be 24 hours a day, always record.
Step 5: Click Configure on the selected camera schedule or double click
on any schedule bar to modify the recording mode.
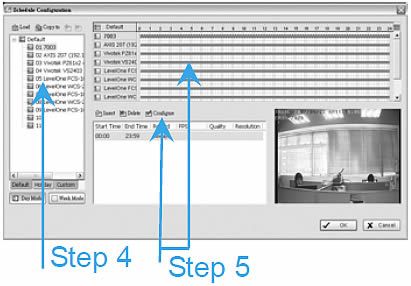
Step 6: When satisfied with the schedule setting, click OK to update the recording schedule.
Step 7: Click OK again to go back to the Main Console.
SET SMART GUARD
Step 1: Go to Start > All Programs > NUUO > Main Console.
Step 2: Type in username and password and log on to the system.
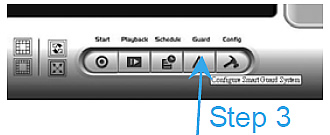
Step 3: In the Main Console, go to Guard.
Step 4: Select a camera and then click on Insert Event.
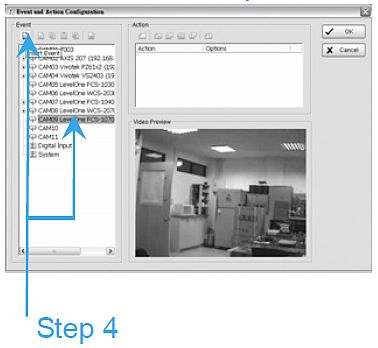
Step 5: Select General Motion as the event type, click OK.
Step 6: In the Alarm Event Configuration panel, set the detection zone as "All", and then click OK to exit the panel.
Step 7: Click OK to go back to the Main Console.

|
|
|