|
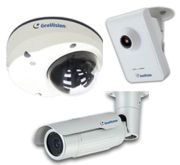 Geovision IP Camera Remote Access iPhone Geovision IP Camera Remote Access iPhone
These step by step instructions will walk the user through the process of accessing a Geovision IP Camera remotely using the GV-Eye iPhone application. The Geovision GV-Eye iPhone application allows the user to store up to 100 devices for quick and easy access. The GV-Eye app also lets the user manually trigger I/O devices connected to the camera, take a snapshot of the live camera view and switch video streams.
Geovision IP Camera Remote Access iPhone
1. First ensure that the correct ports are forwarded in your router. If you have yet to do this, please visit our Geovision IP Camera Network Setup article.
2. Now download the Geovision GV-Eye iPhone application from the Apple App Store. Once the app is installed, go ahead and launch it on your iPhone.
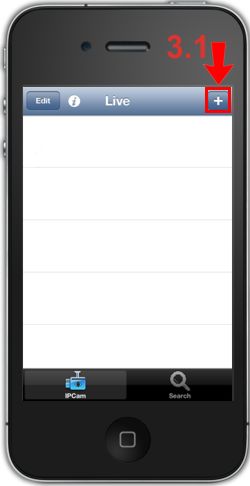
3. On the main page of the application, press the "+" button in the upper right corner of the screen (3.1). (Shown Below)
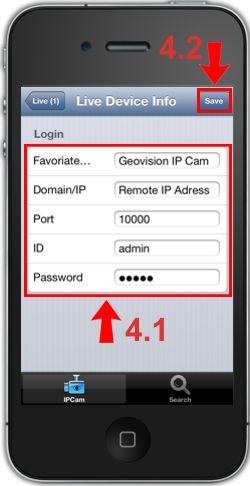
4. Enter the Name of your camera (Can be anything you like), the Remote IP Address, Port 10000, the Username / ID and the Password (4.1). Then press the Save button once you have entered the correct information (4.2). (Shown Below)
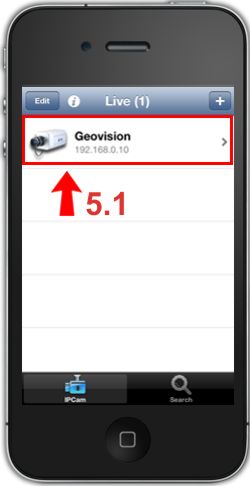
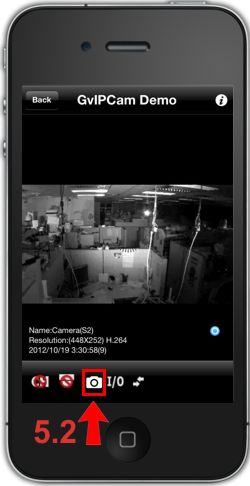
5. You will now be reverted to the home screen. There should now be a device list, press the camera that you wish to view (5.1). The image on the right displays a live Geovision IP camera on the GV-Eye application. You can take a snapshot and save it to your iPhone by pressing the Snapshot button towards the bottom (5.2) (Shown Below)
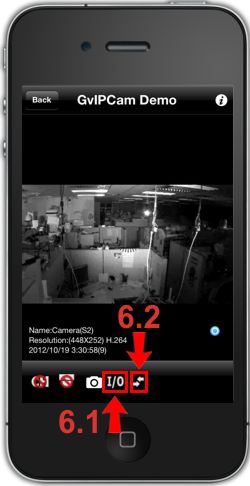
6. To manually trigger I/O devices connected to your Geovision IP Camera, simply press the "I/O" button at the bottom of the live screen (6.1). To change video streams, press the  button (6.2). (Shown Below) button (6.2). (Shown Below)
|


 button

