|
Geovision Surveillance DVR PTZ Camera Setup

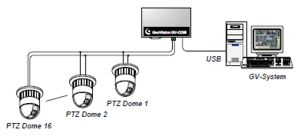
The Geovision Surveillance DVR's are capable of controlling PTZ cameras via the on-screen interface. The PTZ cameras can be manually controlled as well as set to predefined tours. To use a PTZ camera with the Geovision Surveillance DVR system you will need either a GV-NET card or a GV-COM box. They allow an RS-485 cable to be run from the PTZ to the GV-System for control of the PTZ.
PTZ Camera Setup
The instructions below explain how to set up a PTZ camera on a PC based Geovision Surveillance DVR.
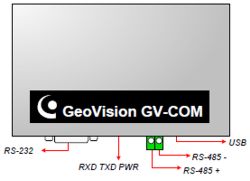
1. If you are using a GV-COM box, connect the RS-485 + and - from the PTZ to the back of the GV-COM box. Then connect the USB port to a USB port on the GV-System PC. (Shown Below) Now move to step 2.
OR
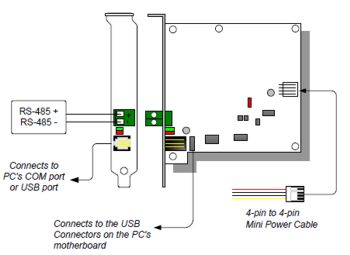
1. If you are using a GV-NET card, insert the card into an empty slot on the PC's motherboard. Then use the 4-Pin Mini Power Cable to connect the GV-NET card to the PC's power supply. Once installed, connect the RS-485 + and - cables from the PTZ camera to the GV-NET card. Now refer to page 2 of the GV-NET Guide for connection setup. (Shown Below) Now move to step 2.
2. Click the Configure  button, then select Accessories. Then select PTZ Device and select Add / Remove PTZ. The menu below will appear. button, then select Accessories. Then select PTZ Device and select Add / Remove PTZ. The menu below will appear.
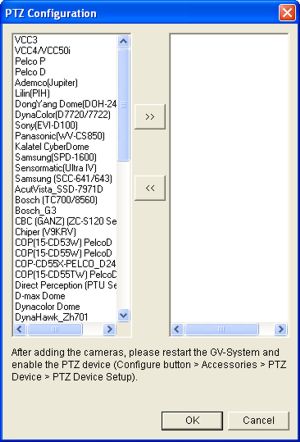
3. Now select the protocol of the camera you are using. (Note: Most PTZ cameras use the Pelco D protocol) This can be found on the boot screen of the PTZ.
4. Once you have selected the correct protocol press the  button, then click OK and restart the GV-System. button, then click OK and restart the GV-System.
5. After the GV-System has restarted, click the Configure button, then Accessories and finally PTZ Device. The menu below should appear.
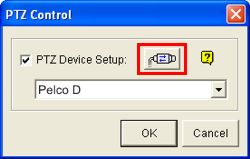
6. Select the Protocol and click the  button. A dialog box will appear, select Active. Then click OK. (Note: This step is very important, without it the PTZ camera will not be added to the GV-System) button. A dialog box will appear, select Active. Then click OK. (Note: This step is very important, without it the PTZ camera will not be added to the GV-System)
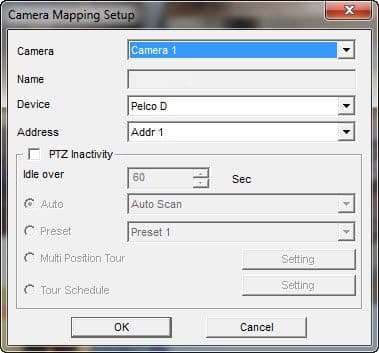
7. Then select the Configure icon, followed by Accessories, PTZ Device and finally Camera Mapping PTZ Dome. (Shown Below)

8. Now set the PTZ Camera channel, Name, Device, and Address. Then press OK. (Shown Below)
9. After the PTZ cameras are added to the GV-System, you should see the PTZ Control button. Click the button to enable the on-screen control panel as shown below. button. Click the button to enable the on-screen control panel as shown below.

10. From the menu above, you will be able to control all the functions of your PTZ camera.
|
|
|